THE DOOR, DOWN TO THE DETAIL

The first gesture.
The finishing touch.

A handle. A texture. A finish. With Weiser, Baldwin and Emtek, find the detail that gives your entrance its character.

Explore the three brands

Weiser Baldwin Emtek

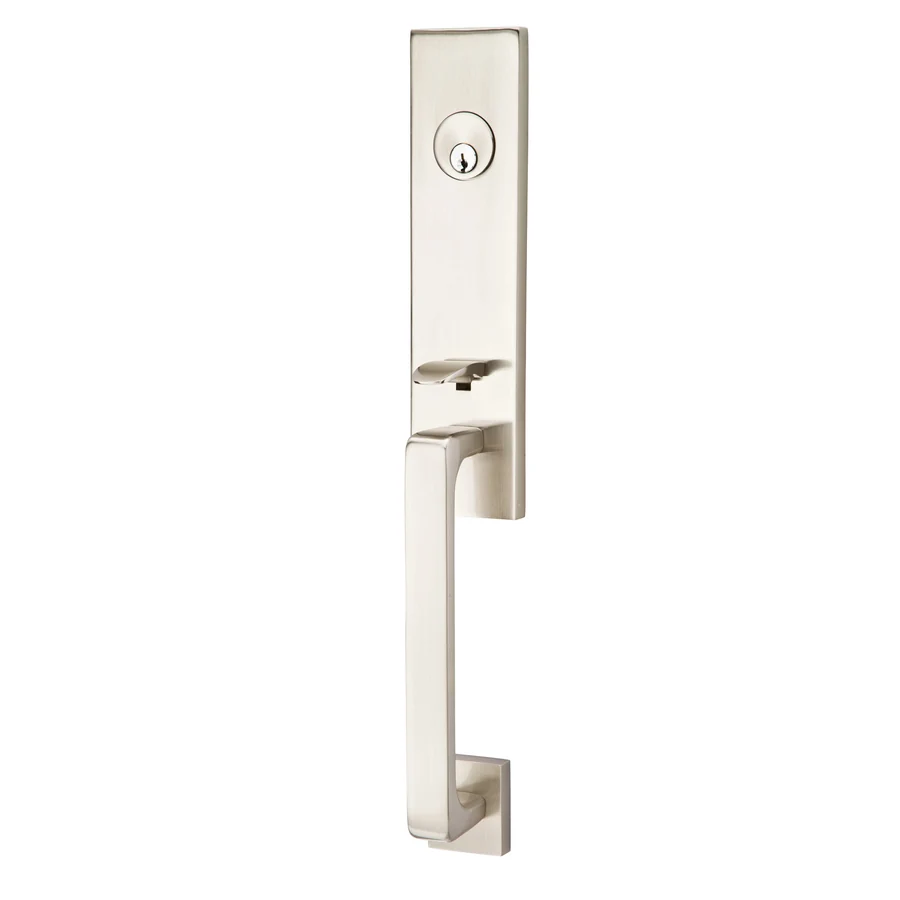
Emtek Davos entry handle in satin nickel, exterior view
Emtek · DavosExterior view · satin nickel↓

OUR MAIN HARDWARE BRANDS

Three signatures.Your way in.

A few references to help describe your style and use. Models, finishes, availability and compatibility will need to be confirmed for your project.

References to explore

Weiser

Made for everyday life.

From entry handles to passage levers and smart locks, start with how you will use the door.

  • Entry handle

    San Clemente + Halifax

    A straight-lined exterior handle paired with the Halifax lever on the inside.

    This reference does not include a deadbolt.

  • Passage lever

    Halifax

    A lever with a square rosette, shown here in the hall or closet version.

    The passage function does not lock.

  • Smart deadbolt

    Halo Select

    A touchscreen for code access, with Wi-Fi or Matter over Thread modes.

    Check features and required equipment for the selected mode.
Explore the brand

References to explore

Baldwin

An architectural presence.

Proportions, plates and details: two references from the Estate and Reserve collections for a considered entrance.

  • Estate · mortise trim

    Minneapolis

    An elongated plate and clean lines for an architectural composition.

    Trim only: the mortise assembly and door preparation must be specified.

  • Reserve · deadbolt

    Contemporary Square

    A single-cylinder deadbolt with a restrained square silhouette.

    A tubular reference. Coordinate it with the handle and door preparation.

Explore the brand

References to explore

Emtek

Your signature, in the detail.

A lever line, a rosette, a finish. Explore the combinations offered for your chosen model, from mechanical to connected.

  • Tubular entry set

    Davos

    A monolithic plate and elongated grip. The illustrated version is satin nickel.

    Exterior view. Confirm dimensions and interior components.

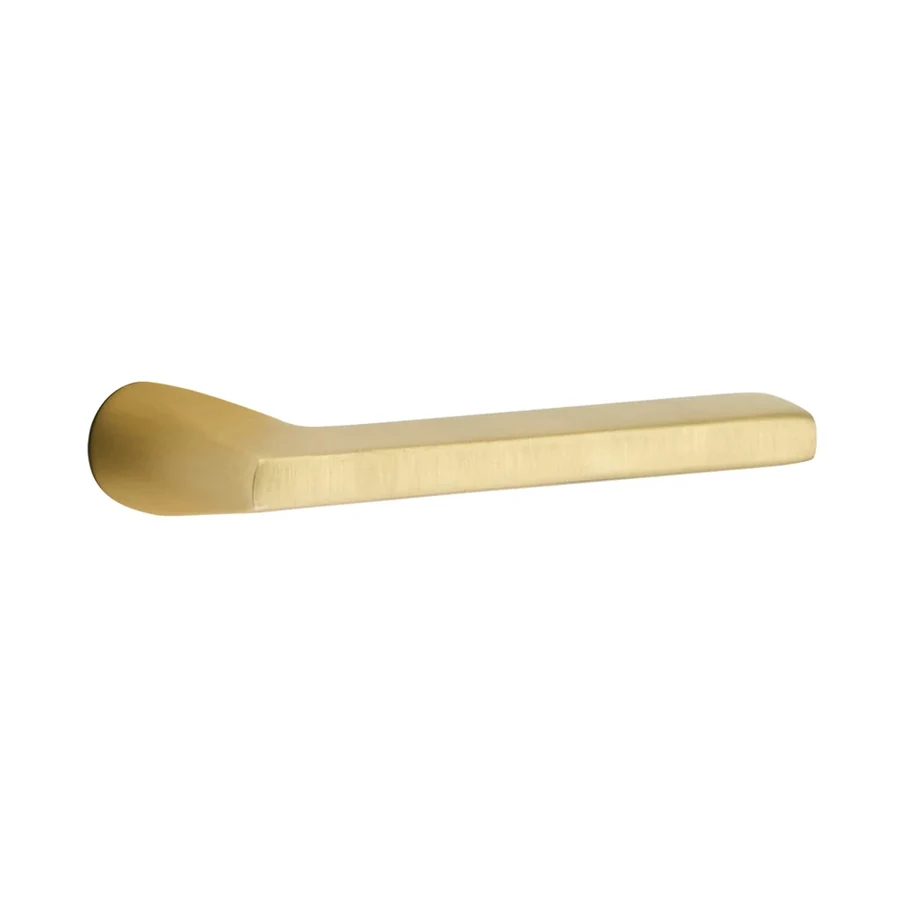
  • Lever · choose a rosette

    Helios

    A sculpted lever, shown in satin brass. Choose a rosette from the compatible options.

    The image shows the lever alone, without a rosette or lock.

  • Connected entry set with key

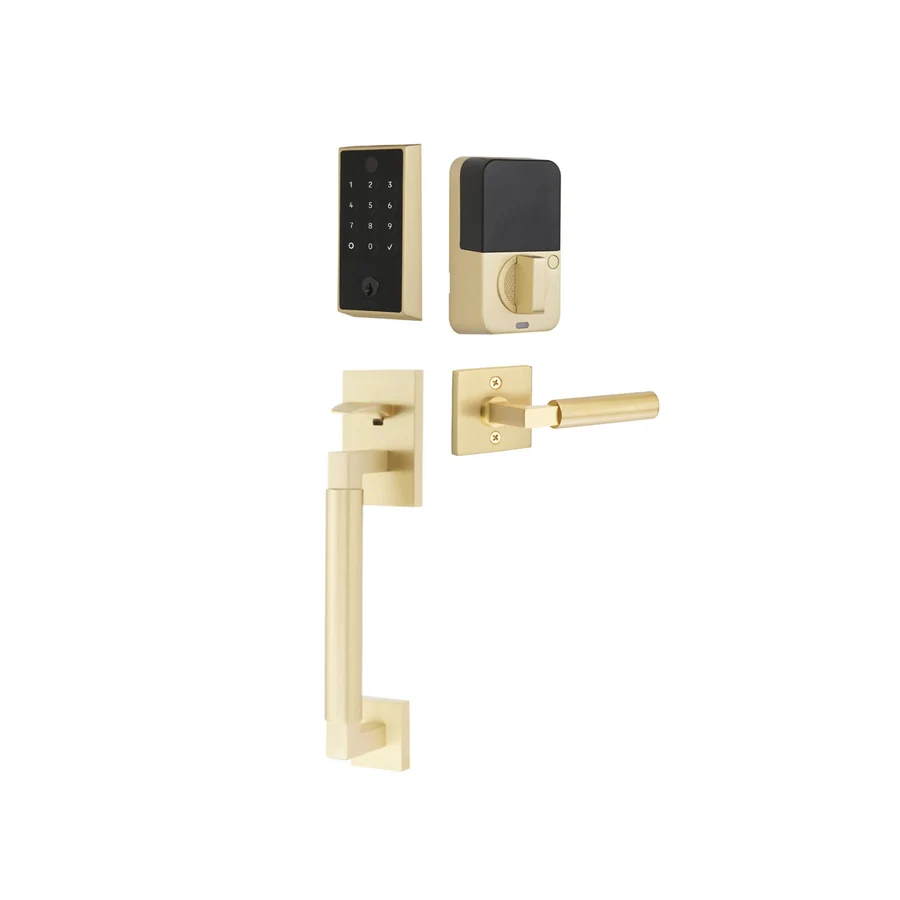
    EMPowered 2 + Hercules

    Touch access, a smooth Hercules grip and a key. Both sides are illustrated in satin brass.

    Remote access requires the appropriate Wi-Fi configuration.

Explore the brand

A CLOSER LOOK

The line. The grip.The function.

Three Emtek references to study the proportions and distinguish what you are choosing: an entry trim, a lever or a connected set.

Emtek Davos entry handle in satin nickel, exterior view

Tubular entry set

Davos

Exterior view. Confirm dimensions and interior components.

Emtek Helios satin brass lever, without a rosette

Lever · choose a rosette

Helios

The image shows the lever alone, without a rosette or lock.

Emtek EMPowered 2 keyed entry set with smooth Hercules grip in satin brass, exterior and interior components

Connected entry set with key

EMPowered 2 + Hercules

Remote access requires the appropriate Wi-Fi configuration.

Manufacturer photograph · © Emtek

START WITH HOW YOU USE IT

Which action,at which door?

A collection name is only the start. The function and included components help guide the choice.

  1. Enter and lock

    Coordinate the handle, deadbolt or lock assembly, then check what is included.

    Explore entry handles
  2. Simply open

    Passage is for a door without locking. Privacy, keyed and dummy functions serve different uses.

    See the Halifax lever
  3. Manage access

    Codes, an app and remote access are distinct features. Check the model, connection mode and required equipment.

    See Halo Select

A FINISH THAT CONNECTS

Find yourfinish.

Black, nickel, brass, bronze: start with a direction, then look at the physical sample beside your door.

Photographs suggest a direction. They do not replace a physical sample.

  1. The light

    Compare the finish outside and inside, under your own lighting.

  2. The whole

    Consider the hinges, light fixture and other visible metals too.

  3. The model

    Names, tones and available finishes vary by brand and reference.

BEFORE THE FINAL SELECTION

The right handle.The right preparation.

Four things to review together so that your vision works with your door.

  1. The door

    Thickness, preparation, backset and hole spacing: start with the actual door and its measurements.

  2. The mechanism

    Tubular, mortise or multipoint: the trim must match the exact lock assembly.

  3. The movement

    Handing, hinge side, clearance and function: consider use from both sides.

  4. The components

    Handle, bolt, interior parts and connectivity: confirm what is included and what must be added.

Mortise trim, a passage lever and a handle without a deadbolt do not perform the same function.

Sources and technical references

Each product reference links to the official page. Review the manufacturer’s technical documents before specifying the assembly.

GIVE YOUR PROJECT A DIRECTION

An entrancethat feels like you.

Add hardware to your door project. Your style and everyday use will help guide the details.

Plan my door projectYour interest in hardware will carry into the project flow. No model is selected at this stage.
Plan my project